In This Issue ...
|
November 2006 |
GIMP Tips & Tricks II ...This is the second of a three part series of Tips and Tricks to help you get started and be productive as soon as possible with GIMP. GIMP is an open source image production and editing program. Download it FREE from http://gimp.org. It would be a good idea to have last month’s issue of CompuQuickTips handy so you can read the beginning article first. This issue will focus on Colors and Selections. There are lots of ways to use color in GIMP. The key is knowing how to select the color you want and how to make sure it goes exactly where you want it to go. Color Selection ...
Opening and Closing GIMP ... To keep from losing your Pallets and any other goodies you may want to use from image to image, makes sure when you close GIMP, you use the X at the top of the window with The GIMP in the title bar. If you close pallets first, they won’t be back when you open GIMP again. If you do happen to lose your pallets, you can get them back by clicking the word File, then Dialogs and Create New Dock. Choose the Layers, Channels and Paths as well as the Brushes, Patterns and Gradient docks. Each time you start GIMP the pallet and window layout you set up before will be handy.
Layers and more layers ... More with Selections ... When anything is selected, it is totally under your control. Try any of the filters. To give it a little drop shadow, click Script Fu, then Shadow, and Drop Shadow. If you don’t get the results you want, try clicking the word Select a the top of the image window, then the word Invert. Then try your drop shadow. To get the best selection, use Layers. It is much easier to deal with many layers than it is to try to select a little bit of something on one layer. Turn off selection ... Before you can go on to other things, you must click the word Select at the top of the image window, then the word None. Here you can see a butterfly from a photo. I used the eraser brush to erase everything except the butterfly, then made it a bit smaller and added a drop shadow to it. Then I put the butterfly layer on top of a beautiful background layer (done with TwistedBrush) for the beginning of a terrific new wallpaper creation. Layer Modes ... When you have a terrific background layer and want to add individual selection layers on top, experiment with the Layers Mode options at the top of the layer dialog box. Click the little down arrow and go through the different choices. You will not believe some of the beautiful effects that can happen when you just try something you aren’t familiar with. I used Overlay for the butterfly layer and got a breathtaking result... still not ready to finish it though. There’s a lot more playing I want to do! ENJOY! Where's Your Stuff? ...It is absolutely possible to go overboard when it comes to organizing your files and folders. It doesn't matter how many external hard drives you have, or how huge your main drive is. If you can't find anything, you don't have anything. Installation Basics ... Always install software on your main hard drive. That's where your Operating System is and all the files associated with making your computer, as well as your software work. If your computer is less than three years old, your hard drive is large enough to hold more software than you can imagine. Installing software on an external drive with the idea of saving your main hard drive space or insurance against a hard drive crash is not going to help. Even if your software installation gives you a choice of where to install it, installing to another drive can actually cause system issues. The default installation location is the default because that's the way the programmer designed it. The best use of your extra or external hard drive is to store personal files, or if your software was downloaded, the downloaded installation files. If your software came on CDs, be sure to keep them in a safe place, with any registration information attached to the CD for easy finding if you ever need it again. Hard drive can die, quit, crash, go kaput. It is easy to reinstall your software if you know where it is. Use your My Documents Folder ... for all your personal files. Yes, it is on your main hard drive, but that is what it is for. Backing up your My Documents folder can be an easy drag and drop operation, from your main hard drive to a nice external drive. There is great software available in all price ranges that can help you automate the process. The key here, is to put your backup files, a complete copy of your My Documents folder on a separate hard drive. This will give you plenty of insurance should one or the other bit the big one. You can never replace or reinstall your personal files... files you have created yourself. A nice backup on another drive or even on a recordable CD can be a great comfort. A full backup of your My Documents once a week should be sufficient for most users. It sure beats no backup at all. Check your software ... Make it a mission to find out where your favorite software stores files you create with it. Not everything saves automatically in the My Documents folder. There may be other folders in your Program Files folder associated with your software where plugins, various settings, effects, even personal files may be stored. These folders should be backed up separately to another hard drive or recordable CD. If you are really attached to a certain program, Copy its corresponding folder from the Program Files folder on your main hard drive to a special folder on your external drive, or to a CD. This folder shouldn't be used in place of reinstalling because it won't have all the associated system files that were installed originally, but it may have files you need if you do have to reinstall. Keep your backup folders simple ... Gads! some of these new external hard drives are not only inexpensive, but really huge. You may find yourself wondering what on earth you will do with all that space. Well, that space can get out of hand really quickly if you aren't careful. If you are using it strictly for a comfort backup drive, use general folder names that will be easy for you to understand and organize. Then create sub folders inside your general folders if you need them. For example, you may want to create a Download folder and create separate folders within it for individual downloaded files. Create as many folders in your My Documents folder as you need to organize and consolidate your personal files. Over organizing can be worse than no organization at all if you have so many folders you can't remember where anything is. The secret is setting up your backup folders so you can put your fingers on anything you want, any time you want. How you do it is entirely up to you, but trust me. It is important to have a system that works for you. The more simple you can keep it, the easier it will be to find your stuff! Fun to Visit ...
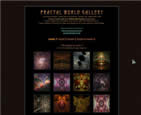
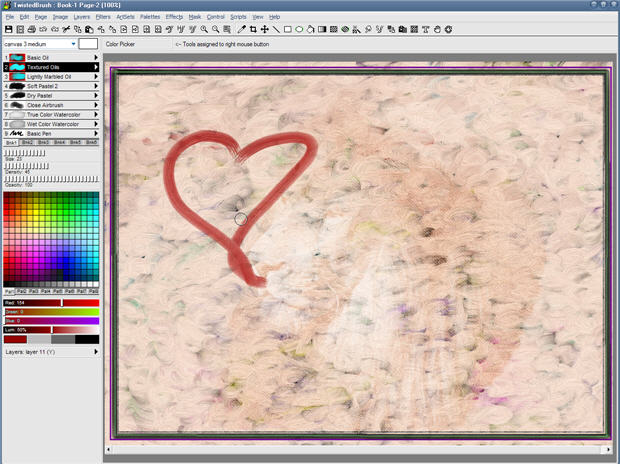
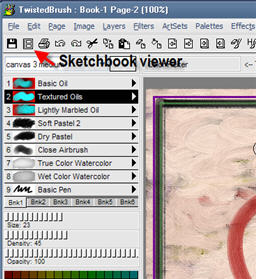
Spiral Photo Gallery ... These will keep you ogling for a long while! Fractal World Gallery ... Beautiful images! Gem - TwistedBrush ...If you have been looking for an easy to use program that will unleash your creative juices, TwistedBrush is what you need. The first time you run it you will be experimenting with brushes and colors in a very friendly "sketchbook" environment, with page 1 of sketchbook 1 open and ready to draw or paint on. Each sketchbook can have up to 100 pages and you can have an unlimited number of sketchbooks. You can even set the sizes of your pages. You will never need to worry about losing your work either. TwistedBrush automatically saves it for you. Even if you consider yourself a beginner, you will be surprised how intuitive TwistedBrush is. Click any of the brushes in the left pallet to make your choice, slide the slider below to adjust the size, click to pick a color and start drawing. If you aren't happy, CTRL+ Z (the universal UNDO command) works just fine!
There is much about TwistedBrush that makes it stand out but I am particularly impressed by the personal support, not only from the skilled and talented programmer/artist, Ken Carlino, but from his very active forums. An extremely supportive community has grown from TwistedBrush artist/users. There is a gallery set up where artists can showcase their work and ask for help and suggestions from other artists of all skill levels. Reading encouraging comments and helpful advice from one artist to another (less or more experienced) artist will make you happy you found such a nurturing environment. You may want to participate in the latest TwistedBrush Art Competition after you have played with it a while. There is no need to feel intimated. Every entry is something to take pride in. You can see many different personalities and skills at work. Each entry is truly a work of art and, win or not, creating and learning is half the fun! And you will learn from this intimate community, dear readers. You will learn a lot! TwistedBrush is a work in progress, with each new version adding many features as a direct result of suggestions from artists who actually use it. Ken Carlino pays attention to the needs and wishes of fellow artists/users. The result is a rapidly evolving piece of work, getting better with each version. Pricing is also different from what you are probably used to. You can choose to purchase a 1 year license for $59.95 (very reasonable) or a lifetime license for $149.95 (less than the cost of many high end graphic programs). This will entitle you to FREE updates and new versions forever. You could begin with a one year license, then once you decide you can't live without it, upgrade to the lifetime license. There is also an older version available for FREE in the download area, but I would highly recommend downloading the latest version. You can give it a try for 15 days ... plenty of time to test drive it. If you find yourself addicted to TwistedBrush, you might even find yourself purchasing a graphic Tablet. With full support for tablets, the ability to use a special pen will allow you to take doodling to a whole new level! Go ahead! You're WORTH it! Look for many new creations in the form of wallpaper and tutorials from old Mrs. Wizard via TwistedBrush in her blog (there's a link to it right on the front page of mrswizard.com). Spend some quality time at the TwistedBrush website. Browse through the forums and soak up the talent and downright good vibes! Enjoy! Tiny Treasures ... 8bf.netIt is a simple web page with a treasure trove of really good filters. Use them (FREE) in PaintShop Pro, Photoshop or any image editing program that accepts Photoshop compatible filters. Installing only requires you to know how to open a zipped folder and drag the 8bf file to your Plugins folder. On the website, the author recommends you create a separate folder named AAA in your Plugins folder. Because you may have more than one image editing program that can use Photoshop-type plugins, I like to recommend you create a separate folder somewhere (possibly in your My Documents folder) and name it Plugins. Install or copy (if they don't need to be installed) any plugins you want to use with all your image editing programs in this common folder. Then it is just a matter of making sure each program you use knows where this common folder is. You should be able to find and set this information in your settings or Preferences area. If you're not sure, drop me an email. Let me know what image editing program you use and I will help you put these plugins where they belong.
Quick Tips ...
|
Nostalgia:
|
|
Stack Error:
|
||
Every morning
|
||
What is a
|
||
|
Got more questions? Search mrswizard.com and compuquicktips.com with Google! Want to have access to ALL the daily tips (mucho plenty and growing!) in one convenient place, all at once? Not to mention an awesome wallpaper collection AND Screensavers! Make a small (one time) donation and gain member access to the Happy Dragon area. Mrs. Wizard | Newsletter Archives Copyright© 2006 Cindy L. O'Neal |
|

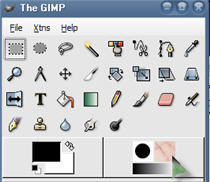
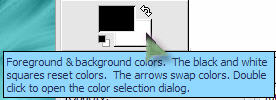 the color selection box is in the main GIMP window. The black box represents the foreground color and the white one is the background color. The smaller boxes below will reset your colors to default when clicked. The little double ended arrows swap the foreground and background colors. The Background color is the color you paint with when you are using brushes. The pencil tool draws with the foreground color. The eraser tool does just what it says, and the airbrush tool draws with the foreground color. To begin, start with a new image with a white background.
 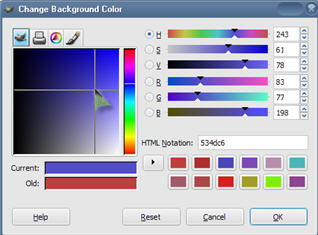 Double click the background color and choose a color by clicking anywhere on the color pallet. Click once on the brush tool and draw on your blank by holding down the left mouse button and dragging.
 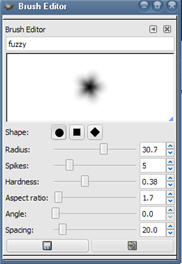 Brushes ...
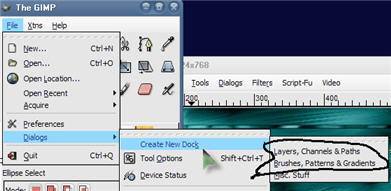
 Making Selections ... If you can select it, you can do something to it, for it or with it. A quick way to see how selections work is to click either the rectangle, ellipse, or freehand selection tools and “draw” a shape on your test image. You will see moving dots around the shape you create. Click the Fill tool (looks like a pouring bucket) and choose a pattern instead of a color. The patterns selection box is to the right of the brush selection box. Click once with your left mouse button in the shape. You should see it “fill” with the pattern you selected. Draw a few more shapes and fill each one with something different. Between each one, click the word Select at the top of the image window, then click the word None. This will allow you to choose a new selection tool and draw another shape.
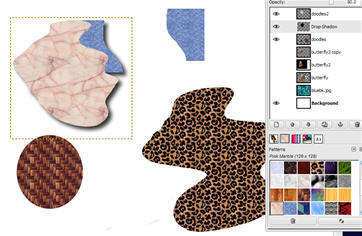 Once you have several shapes created and filled with various patterns, use the same selection tools to select each shape. If you have all your shapes on one layer and they are overlapped, what you select will be moved. It may not be pretty. If each shape is on a different layer, you will be able to move each shape individually. Once you have something selected, move your mouse to the center and notice the pointer changes to a cross hair cursor. This means you can left click and drag the shape, or whatever is selected, to a new location. As long as it is selected, you can move it freely. You can also use the fill bucket to change the color or pattern fill.
 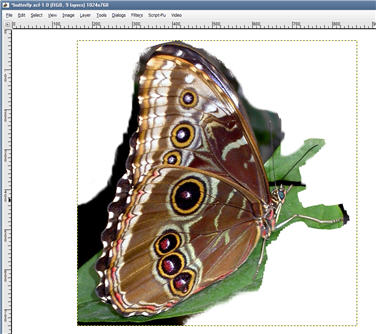 The Eraser ... The eraser tool is great for isolating bits of an existing image. Use it erase away the area around what you want. Drag any photo into your open GIMP image. It will automatically create a new layer for you with the photo on that layer. Click the Eraser brush and choose any brush you want. Use the eraser brush to erase around the part you want to keep. Use a large brush at first, then switch to a smaller, fuzzier brush to get as close to your selection as possible. Everything you “paint” with the eraser brush will become transparent. When you are finished, This layer can be used to blend with other layers, or you can select just the image and use copy and paste to put it into other selections. Use different brushes to give your image a special edge effect. There’s just no end to what you can do with it.
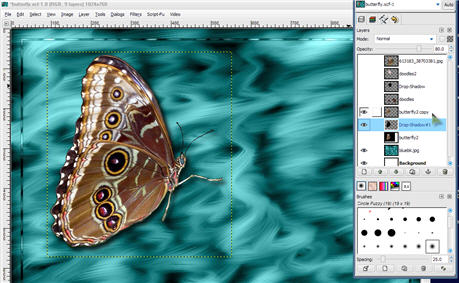

 Stock Xchange
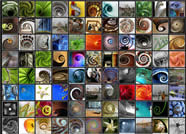
 Saving copies of individual pages to share with friends and those less fortunates who don't have TwistedBrush is easy. Click the word File at the top of the main window, then Save to File. Click the little down arrow to the right of the Save as type box and you will be able to see the several formats you can save a copy as.
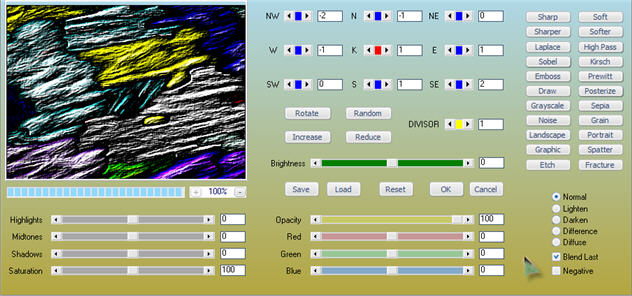 The Textures plugin is fin to experiment with and has very subtle textures available for solid selections. The Custom plugin is the most elaborate, with all kinds of sliders to tweak. Each plugin is easy to use. There isn't much to figure out, and since there is nothing to install they can't hurt your system. Just put them in your Plugins folder and ENJOY!
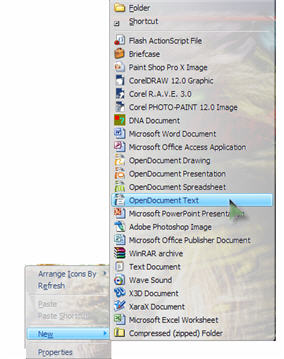 Start Something New ...
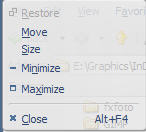 Stubborn Windows ...