Desktop Publishing with Word ...
Not long ago, I did a training session for a lady who was making a transition from MS Works to Word. The more I listened, the more I realized she really needed more of a Desktop Publishing program like Microsoft Publisher. She was needing more precise placement and control over graphics than I thought Word was capable of. After a little poking around, I was surprised to learn there was more to Word than simple letters and templates. You really can control your images and end up with very Desktop Publishing results!
Open MS Word and put several paragraphs of text on the first page. http://www.lipsum.com is a great place to find Lorem Ipsum text. All you need is random text for this tutorial. We are focusting more on image placement and manipulation.
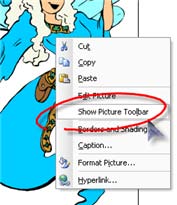
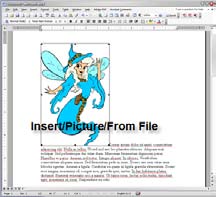 Find and place an image ... Any image will do. Something relatively small is preferable. Make sure your blinking cursor is at the beginning of the text. Click the word Insert at the top of the main window, then Picture, then From File. Choose the image you want to use, then click the Insert button. It isn't going to be pretty yet and you really won't be able to freely move it around. Right click anywhere on your image and choose Show Picture Toolbar. This is the toolbar you will need when you want to tweak any images. Find and place an image ... Any image will do. Something relatively small is preferable. Make sure your blinking cursor is at the beginning of the text. Click the word Insert at the top of the main window, then Picture, then From File. Choose the image you want to use, then click the Insert button. It isn't going to be pretty yet and you really won't be able to freely move it around. Right click anywhere on your image and choose Show Picture Toolbar. This is the toolbar you will need when you want to tweak any images.
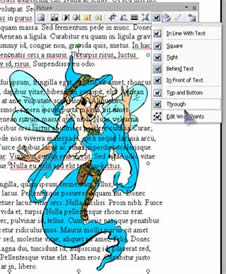
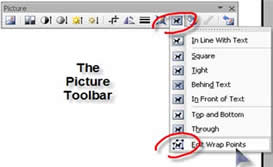
 With the image still selected, click the Text Wrapping button on the Picture Toolbar. You will see a drop down menu with all kinds of choices. Each choice is pretty self explanatory with a picture of how the text will look around the image. Any wrapping option other than InLine with Text will allow cross hairs when you have your mouse pointer in the middle of the image. This means you can drag by holding the left mouse button down and position that image anywhere on the page you want. The text will flow around the image different ways, depending on the text wrapping choice you make. With the image still selected, click the Text Wrapping button on the Picture Toolbar. You will see a drop down menu with all kinds of choices. Each choice is pretty self explanatory with a picture of how the text will look around the image. Any wrapping option other than InLine with Text will allow cross hairs when you have your mouse pointer in the middle of the image. This means you can drag by holding the left mouse button down and position that image anywhere on the page you want. The text will flow around the image different ways, depending on the text wrapping choice you make.
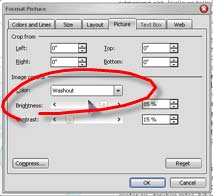 To achieve a nice washed out effect, suitable for a watermark, double click the image to bring up the Format Picture dialog box. Click the Picture tab and choose Washout. You can adjust the percentage of the effect you want with little sliders. Click OK to return to your document and view your handiwork. To achieve a nice washed out effect, suitable for a watermark, double click the image to bring up the Format Picture dialog box. Click the Picture tab and choose Washout. You can adjust the percentage of the effect you want with little sliders. Click OK to return to your document and view your handiwork.
 Use the Behind Text option to have your image appear behind the text on the page. This can give it a nice watermark effect without having to jump through the hoops of actually adding a watermark image in Word. Be sure to make any adjustments to your image before you choose this option, because once it is behind the text, it will be difficult to get to. You can move it with your arrow keys on the keyboard if you can't see the cross hairs. Use the Behind Text option to have your image appear behind the text on the page. This can give it a nice watermark effect without having to jump through the hoops of actually adding a watermark image in Word. Be sure to make any adjustments to your image before you choose this option, because once it is behind the text, it will be difficult to get to. You can move it with your arrow keys on the keyboard if you can't see the cross hairs.
Square wraps text around all sides of the image in a rectangular fashion. Actually when you think of it, all images are really rectangle shaped.
Tight wraps text tightly around the edges of the actual images, if it can find the edges. This doesn't work automatically with all images. If you use .wmf images, it will find edges because .wmf images are vector graphics. Jpg images (like photos) are pretty much rectangles as far as Word is concerned.
 In Front of Text, means just what it says, in front of the text. It isn't a very practical choice if you want to read all the text. In Front of Text, means just what it says, in front of the text. It isn't a very practical choice if you want to read all the text.
Top and Bottom wraps text around the top and bottom of the selected object and excludes the text from the sides. Text stops at the end of above the object and continues below the object.
Through will behave very much like Tight, except it will cause the text to wrap inside any parts of the object that are open.
E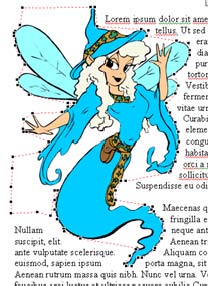 dit Wrap Points is a goodie if you want to really customize the way your text wraps around the image. It will cause a bunch of little squares (wrapping points) around your image. You can add wrap points by left clicking on the line between existing wrap points. Drag the points to shape the area you want to wrap the text around. Your text will wrap to these points when using Tight or Through. dit Wrap Points is a goodie if you want to really customize the way your text wraps around the image. It will cause a bunch of little squares (wrapping points) around your image. You can add wrap points by left clicking on the line between existing wrap points. Drag the points to shape the area you want to wrap the text around. Your text will wrap to these points when using Tight or Through.
Other uses for the Picture Toolbar ... The Picture Toolbar has quite a few shortcuts to often needed adjustments. Remember though, the Picture Toolbar will only work when you have an image selected (clicked). You can always tell your image is selected by the handles (little black boxes) around the image.
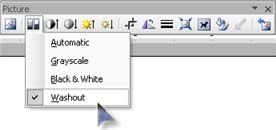 Let your mouse linger over each button to see what it will do. The Color button (second from the left) gives you a quick Washout option if you want to make your image a background watermark. It sure saves a lot of mouse clicks and having to remember what to choose when you right click an image. With the Picture Toolbar you can quickly adjust things like brightness and contrast. If you totally screw up, you can hit the reset picture button on the far right. Of course, this is only a last resort, because you will be forced to start over with your image. If you really don't like something you have done with your image, remember the old faithful keyboard command, CTRL+Z. Word offers unlimited Undos, so you can literally use CTRL+Z to go back one step at a time until you are exactly where you want to be with your image or anything else in Word. Let your mouse linger over each button to see what it will do. The Color button (second from the left) gives you a quick Washout option if you want to make your image a background watermark. It sure saves a lot of mouse clicks and having to remember what to choose when you right click an image. With the Picture Toolbar you can quickly adjust things like brightness and contrast. If you totally screw up, you can hit the reset picture button on the far right. Of course, this is only a last resort, because you will be forced to start over with your image. If you really don't like something you have done with your image, remember the old faithful keyboard command, CTRL+Z. Word offers unlimited Undos, so you can literally use CTRL+Z to go back one step at a time until you are exactly where you want to be with your image or anything else in Word.
A Quick Flip ... If your picture is facing the wrong way, you can use the side handles to Flip it. Grab the left or right handle and drag it to the other side of the image, making sure you go the full width of the image.
Want MORE? ... Here's a little VIDEO on Word Wrapping in MS Word.
 Organizing My Documents ... Organizing My Documents ...
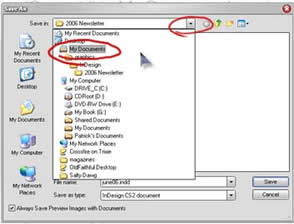
Your My Documents folder is the key to organizing your personal files on your computer. It is one of the easiest folders to find, no matter where you are. Whenever you save a document or an image, you are faced with a mini file manager dialog box. Look for a little down arrow in the Save in box at the top. When you click the little arrow, your choices will drop down. My Documents is always handy.
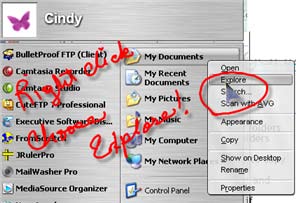
Another way to get to the My Documents folder is to click the Start button at the bottom left of your main screen. You will see your My Documents folder to the right and towards the top. Use your right mouse button. right click to see your choices and choose Explore. This will open your My Documents folder in a separate window with folders in the left pane and the contents of any folder highlighted in the right pane. Click a folder in the left pane (single left click) and see the contents appear in the right pane. You will be exactly where you need to be if you want to poke around and reorganize.
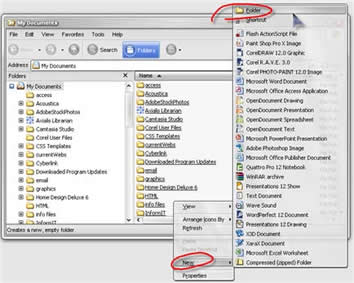 Create a new folder ... Right click in the white area in the right window pane. Choose New, then click the word Folder. The very second you click the word Folder, a new folder will be created with the words New Folder highlighted and with a blinking cursor at the end of the words. Immediately type a name for your new folder. There is no need to hit the delete key or backspace. The moment you begin typing, you will be replacing the highlighted text with your new folder name. When you are finished, click anywhere in the white area of the right pane to lock in your changes. Create a new folder ... Right click in the white area in the right window pane. Choose New, then click the word Folder. The very second you click the word Folder, a new folder will be created with the words New Folder highlighted and with a blinking cursor at the end of the words. Immediately type a name for your new folder. There is no need to hit the delete key or backspace. The moment you begin typing, you will be replacing the highlighted text with your new folder name. When you are finished, click anywhere in the white area of the right pane to lock in your changes.
Once you have your new folder created, you can left click and drag files into it from anywhere. Folders are a great way to organize your My Documents folder. And since the My Documents folder is always so easy to find, any folder you create in it will be just as easy to find, open and save things in.
Remember CTRL+Z ... Any time you need to Undo the last thing you have done, even if you can't remember exactly what it was. While holding the CTRL key down, press the letter Z once. You would be surprised the number of boo boo's this little keyboard command can cure!
Do you NEED a Screensaver? ...
No. You don't really need a screensaver any more. It used to be, back in the old days (about 10 years ago), CRT (cathode-ray tube) monitors needed to be kept busy so they wouldn't be damaged. Leaving a monitor on with its display unchanged for hours at a time would burn up the phosphorescent coating wherever the image was, or behind whatever text or graphics were displayed. This would etch the characters or image into the screen because that area could no longer be illuminated properly. You would see a ghost image of that old image whenever the monitor was on. Once it happened, the only cure was to replace the monitor. Screensavers were created to keep things moving on the screen and eliminate this problem.
Monitors have advanced to the point where burn-in is very rare. The newer flat screen monitors are a totally different technology. You can leave your computer on for days, and your monitor would be just fine. Most home users have a tendency to turn their machine off at night. This is good for both the computer, the operating system and the monitor. They all have a chance to rest and refresh themselves so when you crank that machine up in the morning, everything is raring to go.
Y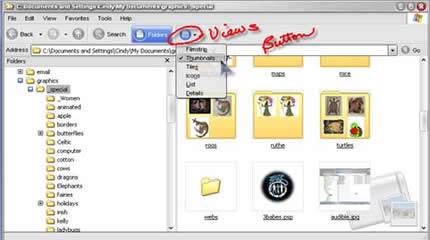 ou certainly don't need to toss the old screensavers out. Now you can actually use them to keep your computer screens busy AND entertaining, or gracefully display your favorite photos when you aren't working, or need to walk away from the machine for a while. There is no need to set your screensaver to activate after 5 or 10 minutes of inactivity. Depending on how you use your computer, sitting back to think for a few minutes and having to jiggle the mouse to turn the screensaver off can be a pain. I have mine set for 45 minutes, but it is pretty rare to see Mrs. Wizard's machine idle for that long. ou certainly don't need to toss the old screensavers out. Now you can actually use them to keep your computer screens busy AND entertaining, or gracefully display your favorite photos when you aren't working, or need to walk away from the machine for a while. There is no need to set your screensaver to activate after 5 or 10 minutes of inactivity. Depending on how you use your computer, sitting back to think for a few minutes and having to jiggle the mouse to turn the screensaver off can be a pain. I have mine set for 45 minutes, but it is pretty rare to see Mrs. Wizard's machine idle for that long.
Windows XP has a slideshow screensaver right at your fingertips. All you need to do is supply the photos, and remember where you put them. Fortunately, Windows XP even makes that easier. The My Pictures folder is the perfect place to store all your photos. It is very handy.Click the Start button at the bottom left of your main screen and you will see a shortcut to the My Pictures folder in the same area as yourMy Documents folder.Actually it is a subfolder in the My Documents folder, but Microsoft thought it was important enough to have its very own shortcut on the Start Menu. 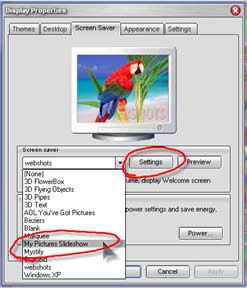 Right click the My Pictures folder and choose Right click the My Pictures folder and choose 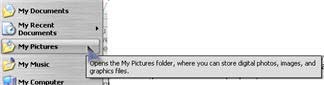 Explore to get a good look at it. You can create other folders within the My Pictures folder for even better organization of your photos and other images. Once you have the My Pictures folder open, you can treat it just like any other folder. You can view your image files as Thumbnails, rather than just file names by clicking the Views button at the top of the window and choosing Thumbnails. Explore to get a good look at it. You can create other folders within the My Pictures folder for even better organization of your photos and other images. Once you have the My Pictures folder open, you can treat it just like any other folder. You can view your image files as Thumbnails, rather than just file names by clicking the Views button at the top of the window and choosing Thumbnails.
To use the My Pictures Screensaver, right click any empty area on your Desktop. Choose Properties to open the Display Properties window. Click the Screen Saver tab. click the little down arrow to the right of the box of choices and choose the My Pictures Slideshow. Click the Settings button to make adjustments to the size of your images, the length of time you want each image to appear, turn transition effects between pictures on or off and even choose a different folder within the My Pictures folder (or any other folder) where the images you want to use are stored.
You might want to create several different folders with images for different moods or themes. It is really all up to you. If you decide you want to remove an image from your slideshow, simply move it to another folder. Any images you add to that folder will appear in your slideshow screensaver.
 Gems - Camtasia & Snagit ... Gems - Camtasia & Snagit ...
Want to know what I use to make nifty video tutorials for you? It's Camtasia! I had been keeping it under my belt (wanted you to think I was really working hard ... hehehe). But I let the guys at WJR know how much I liked it some time back, and realized these two programs have been Gems all along!
Camtasia makes it so easy to record what I am doing on a computer screen. I can even add my lovely voice to it all! Sure makes 'splaining things a lot easier.
Camtasia Studio is actually several programs that can be used together or separately to create anything from a quick tutorial to a full presentation, complete with a CD menu.
No experience is required to begin using Camtasia. Just click the Record the screen button and follow the wizard. It will walk you through all you need to know to get started. All you need to do is hook up your microphone and go for it.
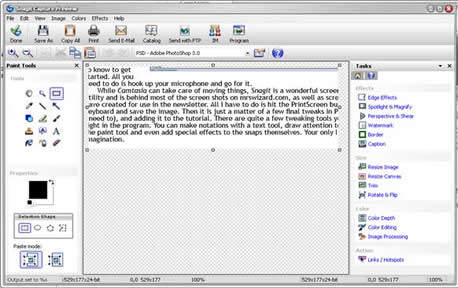 While Camtasia can take care of moving things, Snagit is a wonderful screen capture utility and is behind most of the screen shots on mrswizard.com, as well as screen shots I have created for use in the newsletter. All I have to do is hit the PrintScreen button on the keyboard, outline the area I want to capture and save the image. You are not limited to plain rectangular captures either. There is a freehand capture setting that will knock your socks off. While Camtasia can take care of moving things, Snagit is a wonderful screen capture utility and is behind most of the screen shots on mrswizard.com, as well as screen shots I have created for use in the newsletter. All I have to do is hit the PrintScreen button on the keyboard, outline the area I want to capture and save the image. You are not limited to plain rectangular captures either. There is a freehand capture setting that will knock your socks off.
Then it is just a matter of a few final tweaks in Photoshop (if I need to), and adding it to the tutorial. There are quite a few tweaking tools you can use right in the program. You can make notations with a text tool, draw attention to areas with the paint tool and even add special effects to the snaps themselves. Your only limit is your imagination. It is actually a very robust image editing program all by itself.
Both programs are very easy to install and as long as you can find your microphone jack on the back of your computer, Camtasia is smart enough to even set that up for you. There are plenty of advanced techniques to satisfy anyone, but even a beginner should be pretty comfortable using Camtasia or Snagit. To learn more, be sure to visit their website. You can download the software and try it out for free for 30 days. There is plenty of informationin the Learning Center to help you make friends with either or both programs right away.
You just need to go for it!
http://techsmith.com
Tiny Treasures - VirtualPhotographer ...
I 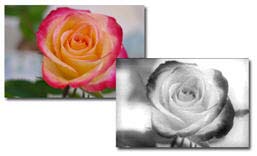 love plugins, especially FREE plugins. VirtualPhotographer is so easy and fun to use, with features so high end, you will have to remind yourself it is a freebie. love plugins, especially FREE plugins. VirtualPhotographer is so easy and fun to use, with features so high end, you will have to remind yourself it is a freebie.
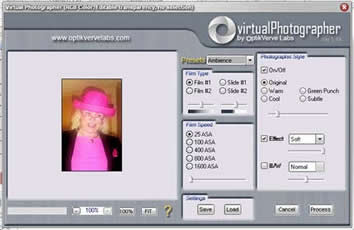
VirtualPhotographer can take your digital camera images and with just a few mouse clicks and a choice of over 50 presets, apply beautiful artistic effects that create the look of film.
It works with any paint program that will accept Photoshop plugins. The installation file is only 273 Kb. Installation is as easy as double clicking the downloaded program file (virtualPhotographer.exe). You will end up with a folder on your desktop (or wherever you downloaded the original installation file) named optikVerveLabs. Drag this folder into your photo editor's plugins folder. Make sure you do this when you are not using your photo editing software.
 To use VirtualPhotographer in Photoshop: To use VirtualPhotographer in Photoshop:
Open any photo. Make a copy of the original layer to experiment with. While the layer copy is selected, click the word Filter, then OpticVerveLabs, then VirtualPhotographer. This will open the plugin. Fiddle around with the presets to get an idea of what it can do. When you are satisfied with the results, click the Process button. VirtualPhotographer will disappear and your finished product will appear in your Photoshop window.
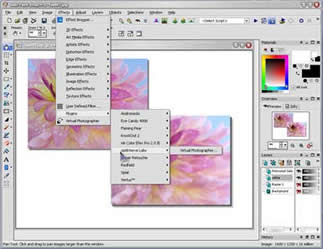
To use VirtualPhotographer in PaintShop Pro:
Open any photo. Make a copy of the original layer to experiment with. While the layer copy is selected, click the word Effects, then move the mouse pointer down to the word Plugins and choose optikVerveLaps and VirtualPhotographer. When you are finished, click the Process button to see your results in the PaintShop Pro window.
Have Fun!
http://www.optikvervelabs.com | extra goodies to download - http://www.optikvervelabs.com/downloadextras.asp
Quick Tips ...
Find those hidden goodies ... Learn to let your mouse linger over anything that has a little arrow to the right. That little arrow usually means more, and letting the mouse pointer linger can cause all kinds of extra options to appear.
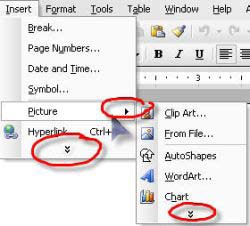 More hidden goodies ... If you don't see all the menu options when you click menu words at the top of a window, look for a clue for more, usually in the form of two little downward pointing arrows at the bottom of the list. More hidden goodies ... If you don't see all the menu options when you click menu words at the top of a window, look for a clue for more, usually in the form of two little downward pointing arrows at the bottom of the list. 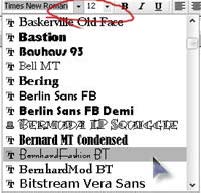 You might even see a little arrow to the right of menu options on the list itself. Let your mouse pointer hover over it and voila! MORE! You might even see a little arrow to the right of menu options on the list itself. Let your mouse pointer hover over it and voila! MORE!
And there's more! ... Look for dialog boxes with down pointing arrows to the right. This is a sure sign there is plenty to choose from. A common choice box would be the font choices at the top of your favorite word processor. Click the little down pointing arrow to the right of the box and you can scroll until you find just the right one! The little arrow to the right of the box (with numbers) is to give you a choice of font size.
Check out the F4 key ... There are several things the F4 key (called a function key) on the top row of your keyboard can do for you. With the ALT key as its partner (ALT+F4), you can use it to close anything you have open at the time. Give it a whirl and watch the window you have open just close without so much as a "by your leave." If you are using one program that has many different documents opened within it, press CTRL+F4 and just the top window will close instead of the whole program.
You can also use F4 to shut down your computer. Make sure you don't have any programs running and press Alt+F4. That will bring up the "Turn off your computer" box and you can go from there. Pressing ALT+F4 is the same as clicking the Start button, then the words Turn off computer.
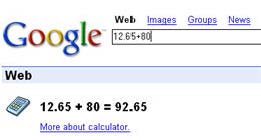 Google has a Calculator! ... Now this is slick! If you have a google search box on your browser (and who doesn't?), just type in what you want to calculate and hit the Enter key on your keyboard. Google will come up with the answer quicklly and neatly. The darn thing will even do conversions... Try typing 6 miles in inches in your google search box and see what happens. You math aficionados will love it. Be sure to click where it says More about calculator to learn what else it can do. Google has a Calculator! ... Now this is slick! If you have a google search box on your browser (and who doesn't?), just type in what you want to calculate and hit the Enter key on your keyboard. Google will come up with the answer quicklly and neatly. The darn thing will even do conversions... Try typing 6 miles in inches in your google search box and see what happens. You math aficionados will love it. Be sure to click where it says More about calculator to learn what else it can do.
On 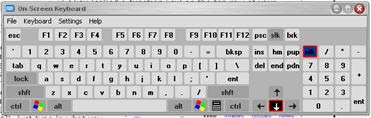 Screen Keyboard ... You won't believe this ... Click the Start button, then click Run and type in osk. Click OK and a mini keyboard will pop up on your screen. Use it in any program to type by clicking the letters withyour mouse. Now you can eat ribs with one hand and type with the other! Screen Keyboard ... You won't believe this ... Click the Start button, then click Run and type in osk. Click OK and a mini keyboard will pop up on your screen. Use it in any program to type by clicking the letters withyour mouse. Now you can eat ribs with one hand and type with the other!
Remember
... There are a lot more QuickTips each month in the Member area. AND I've
gathered up all the videos and other goodies in the member area too, so they
are nice and handy. You won't have to dig through old newsletters to find
them. All it takes is a one time donation to show you care, and
the member area is all yours!
For more
information...
Warmest Regards,
Cindy O'Neal (aka Mrs. Wizard)
http://mrswizard.com
http://compuquicktips.com
Extra info:
Acrobat Reader tips:
http://mrswizard.com/archives/acrobat_reader_tricks.html
(for the older archived newsletters)
How to download: http://mrswizard.com/downloading.htm
Reader Support is what keeps CompuQuickTips FREE. Be sure and pass it along to
your friends and family and when you share something new, remember to say, "I
learned it from Mrs. Wizard!"
CompuQuickTips is sent to email subscribers only. If you feel you have received
this message in error, or no longer want to receive your monthly issue, just hit
REPLY to this email and let me know and I will be sure to remove you from the
list. If someone has forwarded this email to you and you don't want to miss a
single issue, hit the same REPLY button and let me know you want me to add you
to the subscription list.
|